
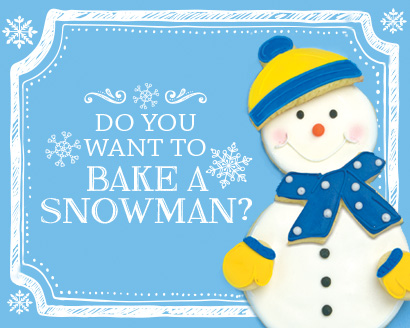

Do You Want to Bake a Snowman?
Categories: Cookie Decorating | Cookies, Brownies & Bars | christmas
Here's everything you need to bake and build your own Snowman for gift giving!
STEP 1 - Bake a Batch of Classic Sugar Cookies
- 4 cups sifted all-purpose flour (sift flour before measuring)
- 2 tsp baking powder
- 1 tsp salt
- 1 1/2 sticks butter or margarine, softened
- 1 1/2 cups Domino® Granulated Sugar
- 2 eggs
- 1 1/2 tsp vanilla extract
Preheat oven to 350°F.
Sift together flour, baking powder and salt; set aside.
In a large bowl, beat the softened butter with the sugar until fluffy. Add eggs and vanilla, beat well. Stir in dry ingredients, a third at a time, until all is incorporated for a smooth, stiff dough.
Using waxed paper lightly dusted with powdered sugar, roll out a portion of the dough into a 1/4 inch thick rectangle. Using snowman templates provided below, cut shapes into dough. Trim away excess dough. Gently lift cut out cookies from waxed paper and place on greased cookie sheets. Repeat rolling and cutting until all dough is used.
Bake at 350°F for 10 minutes or until cookies are firm and light golden brown. Remove from cookie sheet and allow to cool completely before decorating.
NOTE: This dough is very easy to work with and does not require refrigeration before rolling. Can be stored in the refrigerator for several days; allow to come to room temperature before rolling.
STEP 2 - Use the Snowman Templates to Cut Out Your Snowman Shapes
Print out the adorable cookie cutter templates below on card stock and use to create your snowman shapes. Our Classic Sugar Cookies recipe makes 6 complete sets of snowmen.
STEP 3 - Make our Royal Icing to Decorate Your Cookies
- 2 cups Domino® Powdered Sugar
- 1 1/2 tbsp meringue powder
- 3 tbsp warm water
- assorted food coloring
In a bowl, with mixer at medium speed, beat powdered sugar, meringue powder and warm water until stiff peaks form, about 5-7 minutes. If icing is too thick, add a couple drops of water. If icing is too thin, add additional powdered sugar, and continue beating until desired consistency. Tint icing with desired food coloring. Using pastry bag with decorator tip, decorate as desired.
Makes about 1 1/2 cups.
You will need:
One batch of royal icing, pink luster dust, 9 piping bags, paintbrush or cotton swab, 5 containers for icing and decorative gift boxes.
Separate Royal Icing into 5 containers and color with food coloring to create your snowman colors (white, black, yellow, blue and orange). Allow more icing for the container that will remain white. Place plastic wrap directly on top of icing in each container to keep it from drying out until you are ready to work with it.
Cut off the tips of 5 re-sealable plastic bags. Place a small scoop of icing in each bag. Icing should be of medium to firm stiffness. Leave some icing in each container (except orange) to use to fill cookies.
Outline circles with white for snowman head and body.
Outline bowtie with yellow.
Outline scarf, bottom and top of snow hat and fill band on mittens with blue.
Outline center of snow-hat, mittens (create indent for thumb; don’t follow oval cookie shape exactly) and band on top-hat with yellow.
Outline top-hat with black. Add a black line above and below the outline for the yellow band to prevent the black icing from bleeding into the yellow.
Add water to remaining icing in containers until it flows more freely. When you run a knife though the icing, it should come back together within 15 to 20 seconds.
Cut tips off of another 4 re-sealable plastic bags (you can cut off a larger portion of the tips this time) and fill bags with thinned icing.
Fill in the areas you just outlined. For the hats, fill in one color at a time and allow icing to dry for 20 to 30 minutes before filling in the other color (ie for the top hat, fill in the black portion, let it dry and then go back and fill in the yellow).
Allow base icing to dry for a few hours or overnight.
Use piping bags with medium to firm icing to decorate your snowman and the accessories.
Pipe black dots on head for eyes and three black dots on body for buttons. Start the buttons a third of the way down the body to allow room for the scarf.
Use orange icing to create the snowman’s nose. Pipe a circle that is slightly larger than the eyes. Use the white icing to create a mouth.
Use a small, loose paintbrush (or cotton swab) to brush a little pink luster dust on the snowman’s cheeks.
Outline accessories and add accent lines where desired. Add polka dots to bowtie and scarf.
Allow cookies to dry for a few hours. Assemble or package your snowman as desired.
STEP 4 - Print and Attach Gift Tags for Gift Giving
The gift tags are on page 2 of the PDF below.
Snowman Template and Gift Tags
The PDF below contains the Snowman Cookie Template and the Gift Tags to attach to your gifts.
Deliciousness Delivered to You
Join our E-newsletter community and you’ll be among the first to receive the latest special offers, recipes, tips and more. Join us!