

Cake Decorating Techniques
Cake Frostings and Icings
A beautifully decorated cake begins with a perfectly frosted surface. Before you plan your project, review our expanded frosting primer, which includes recipes and helpful hints. We recommend a buttercream frosting as a base. For special effects, you may also need Royal Icing.
Pastry Bags and Tubes
To Make Decorating Bags: You need at least one bag for each color icing you use. If more than one tip is used for a particular color, you'll need a bag for each tip. We used five bags for the birthday cake in the photo above.


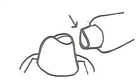
Squeeze frosting down to fill tube. Continue folding top down as tube empties.
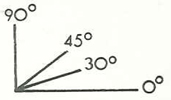
To Make Star Border: Use tip No. 21 and hold the bag at 90° angle to cake. Pipe out individual stars.
To Make Zigzag Border: Use tip No. 21 and hold bag at 30° angle to cake. Pipe out a continuous border.
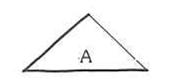
To Make Leaves: Use tip No. 67 and hold bag at 45° angle to cake.
To Write: Use tip No. 3 and hold bag at 45° angle to cake.
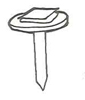

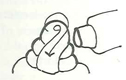
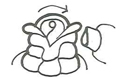
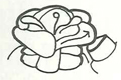
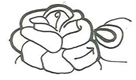
Use waxed paper to remove rose to plate. Refrigerate for about 20 minutes before removing from paper with knife to place on cake.
Sugar Molding
To Mold Sugar: Measure 5 cups Domino® Granulated Sugar into glass or ceramic bowl. Add 1 egg white or 2 tablespoons water. Rub mixture between palms until thoroughly blended and cohesive. Add more water if necessary. For various colors, divide into separate bowls, add a few drops food coloring to each bowl: rub again until color is evenly mixed. Keep bowls covered with damp towels.
Pack sugar very firmly into each dry mold. Level off surface with straight knife. Place piece of cardboard over mold and invert: lift off mold, tapping to loosen if necessary. If shape falls apart, sugar is too dry and needs a few drops more water. If shape sticks to mold, mixture is too wet and needs a little more sugar. Molds that are to be used repeatedly should be dusted with cornstarch.
Let shapes dry at room temperature for 45 minutes to one hour, until crust hardens. To hasten drying, place in sunlight or put in preheated 200°F oven 5 minutes. The shapes can be hollowed out with a teaspoon and the scooped-out sugar reused. The dampened sugar mixture can be kept for a few days in a tightly covered container for reuse.
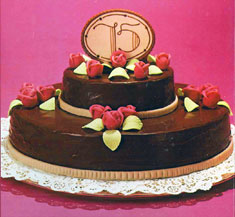
Anniversary Cake
The grand cake pictured on the left was created by Bo Friber, pastry chef of the California Culinary Academy in honor of the 75th Anniversary of C&H Sugar (our sister brand on the West Coast) in 1981. In designing this celebration cake, Chef Friberg chose a recipe that would be elegant to behold and, at the same time, within reach of the novice to prepare. Although the Anniversary Cake requires careful assembly and is composed of more parts than any of our other desserts, it can be done with patience. Each of the components can be prepared one or two days in advance and the entire cake can be put together early on the day of the party when there are no distractions. For spectacular results that will gratify the cook as well as the guests, read the directions several times before beginning and proceed one step at a time.
Deliciousness Delivered to You
Join our E-newsletter community and you’ll be among the first to receive the latest special offers, recipes, tips and more. Join us!