
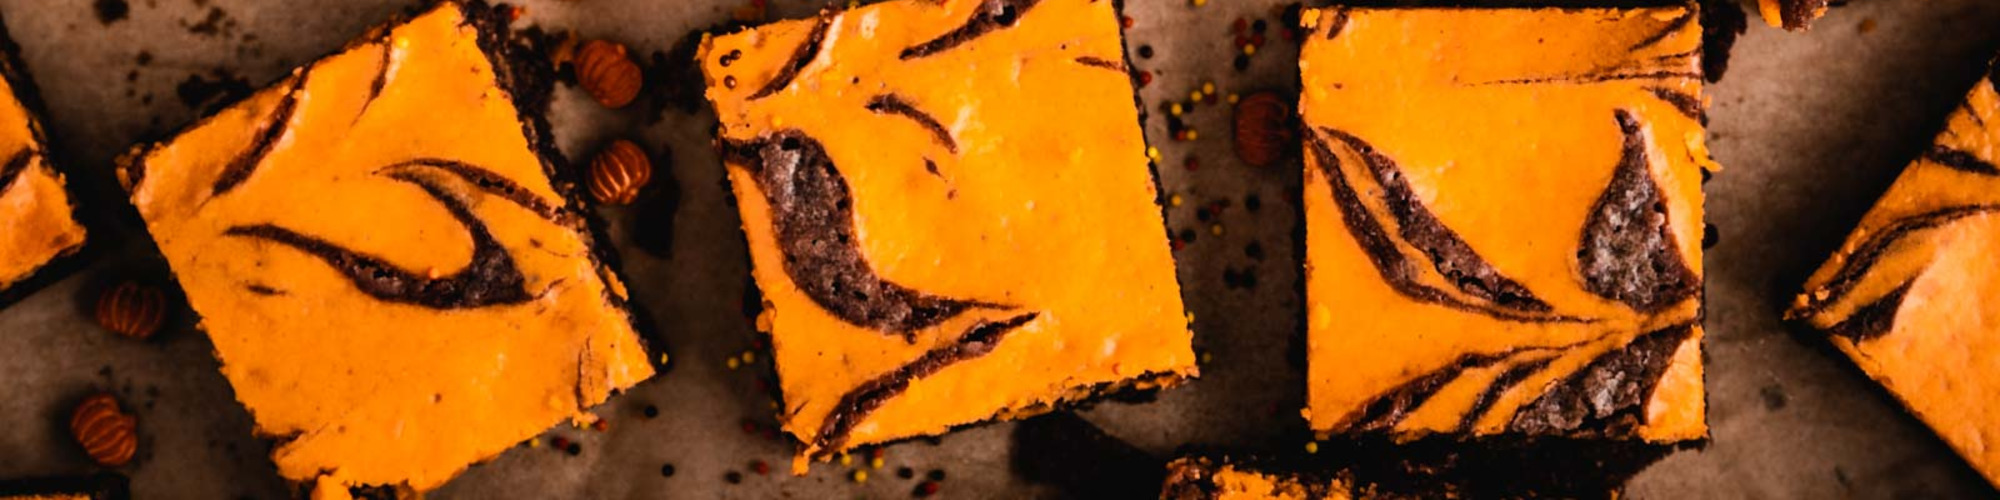


Halloween Cream Cheese Brownies
Categories:
Ingredients
Brownie Batter
1/3 cup Unsweetened cocoa powder
- 1/2 cup Boiling water
- 1/4 cup Semisweet chocolate chips
- 4 tablespoons (1/2 stick) Unsalted butter, melted
- 2/3 cup Vegetable oil
- 2 Large eggs
- 2 Large egg yolks
- 2 teaspoons Vanilla extract
- 2 1/4 cups Domino® Golden Sugar
- 1 3/4 cups All-purpose flour
- 1 teaspoon Kosher salt
Cream Cheese Swirl
8 ounces Cream cheese, room temperature
- 1/4 cup Domino® Golden Sugar
- 1 Large egg
- 1/2 teaspoon Vanilla extract
- 8-10 drops Orange gel food coloring
- Optional - Candy Eyeballs
- Optional - Halloween sprinkles
- Optional - Small amount of frosting or decorating icing to "glue" eyeballs
Rate Recipe

Instructions
Bake Mode
Prevent your screen from going dark as you follow along.
Prep Time: 15 minutes / Cook Time: 25 minutes / Yields: 15 brownies
Step 1
Preheat the oven to 350º Fahrenheit. Line a 13 by 9-inch baking pan with parchment paper and set aside
Step 2
Whisk cocoa powder and boiling water together in a large mixing bowl until smooth. Add chocolate chips and whisk until chocolate is melted. Whisk in melted butter and oil. (Mixture may look curdled.) Add eggs, egg yolks, and vanilla and continue to whisk until smooth and well combined. Whisk in Domino® Golden Sugar until fully incorporated. Add flour and salt and mix with rubber spatula until combined
Step 3
Scrape batter into prepared pan, reserving ¼ cup to swirl on top with the cream cheese mixture
Step 4
Set aside while you prepare the cream cheese mixture
Step 5
Combine cream cheese and Domino® Golden Sugar in a medium-sized bowl. Use a stand mixer or hand mixer to beat until smooth and creamy. Stir in egg and vanilla extract. Mix until well combined. Add 8-10 drops of orange gel food coloring and mix until evenly combined
Step 6
Dollop the cream cheese mixture over prepared brownie batter then dollop reserved ¼ cup of brownie batter to fill in some of the spaces next to the cream cheese dollops. Use a knife to gently swirl the brownie and cream cheese mixture together, being careful not to swirl too much as the swirl pattern will get muddled
Step 7
Dollop the cream cheese mixture over prepared brownie batter then dollop reserved ¼ cup of brownie batter to fill in some of the spaces next to the cream cheese dollops. Use a knife to gently swirl the brownie and cream cheese mixture together, being careful not to swirl too much as the swirl pattern will get muddled
Step 8
Allow the brownies to cool in the pan for 10 minutes on a wire cooling rack. Using parchment paper overhang, lift brownies from the pan. Return brownies to the wire rack and let cool completely, about 1 hour
Step 9
Optional: Decorate brownies with candy eyeballs by sprinkling them on top of the brownies or sticking them to the brownies using a small amount of frosting or decorating icing dabbed on the back and pressing them gently onto the brownies. Sprinkle with festive Halloween sprinkles
Step 10
Cut into squares and serve
Additional Tip
- Start out just a few drops of orange food coloring and add more, 1-2 drops at a time, until desired color is reached. Adding too much at once could result in an undesirable color and there’s no going back
- Be careful not to over-bake your brownies. Check for doneness by inserting a toothpick directly in the center. There should be just a few crumbs stuck to the toothpick and no raw batter. Over-baking will lead to cakey or rubbery brownies vs chewy brownies
- I recommend using a metal baking pan vs a glass pan. Glass retains heat very well and the brownies will continue baking in the pan for a while after they are removed from the oven, potentially leading to over-baking. If using a glass baking dish, remove the brownies from the oven 5 minutes before the bake time called for in the recipe.
Rate Recipe


Meet the Chef:
Kimberlee Ho
@kickassbaker
Kim is the blogger behind Kickass Baker. She is a home baker, wife, mom of two beautiful girls, and an active seeker of a life in balance. Kim shares approachable baking recipes and tips for busy families like her own. Follow along at kickassbaker.com!
Deliciousness Delivered to You
Join our E-newsletter community and you’ll be among the first to receive the latest special offers, recipes, tips and more. Join us!