


SweetAmbs®: Mother's Day Tattoo Cookies
Categories: Decorating Cookie Decorating | Cookies, Brownies & Bars | Mother's Day
Amber's Tips
Here are some of the tools Amber used in making the Mother's Day Tattoo Cookies:
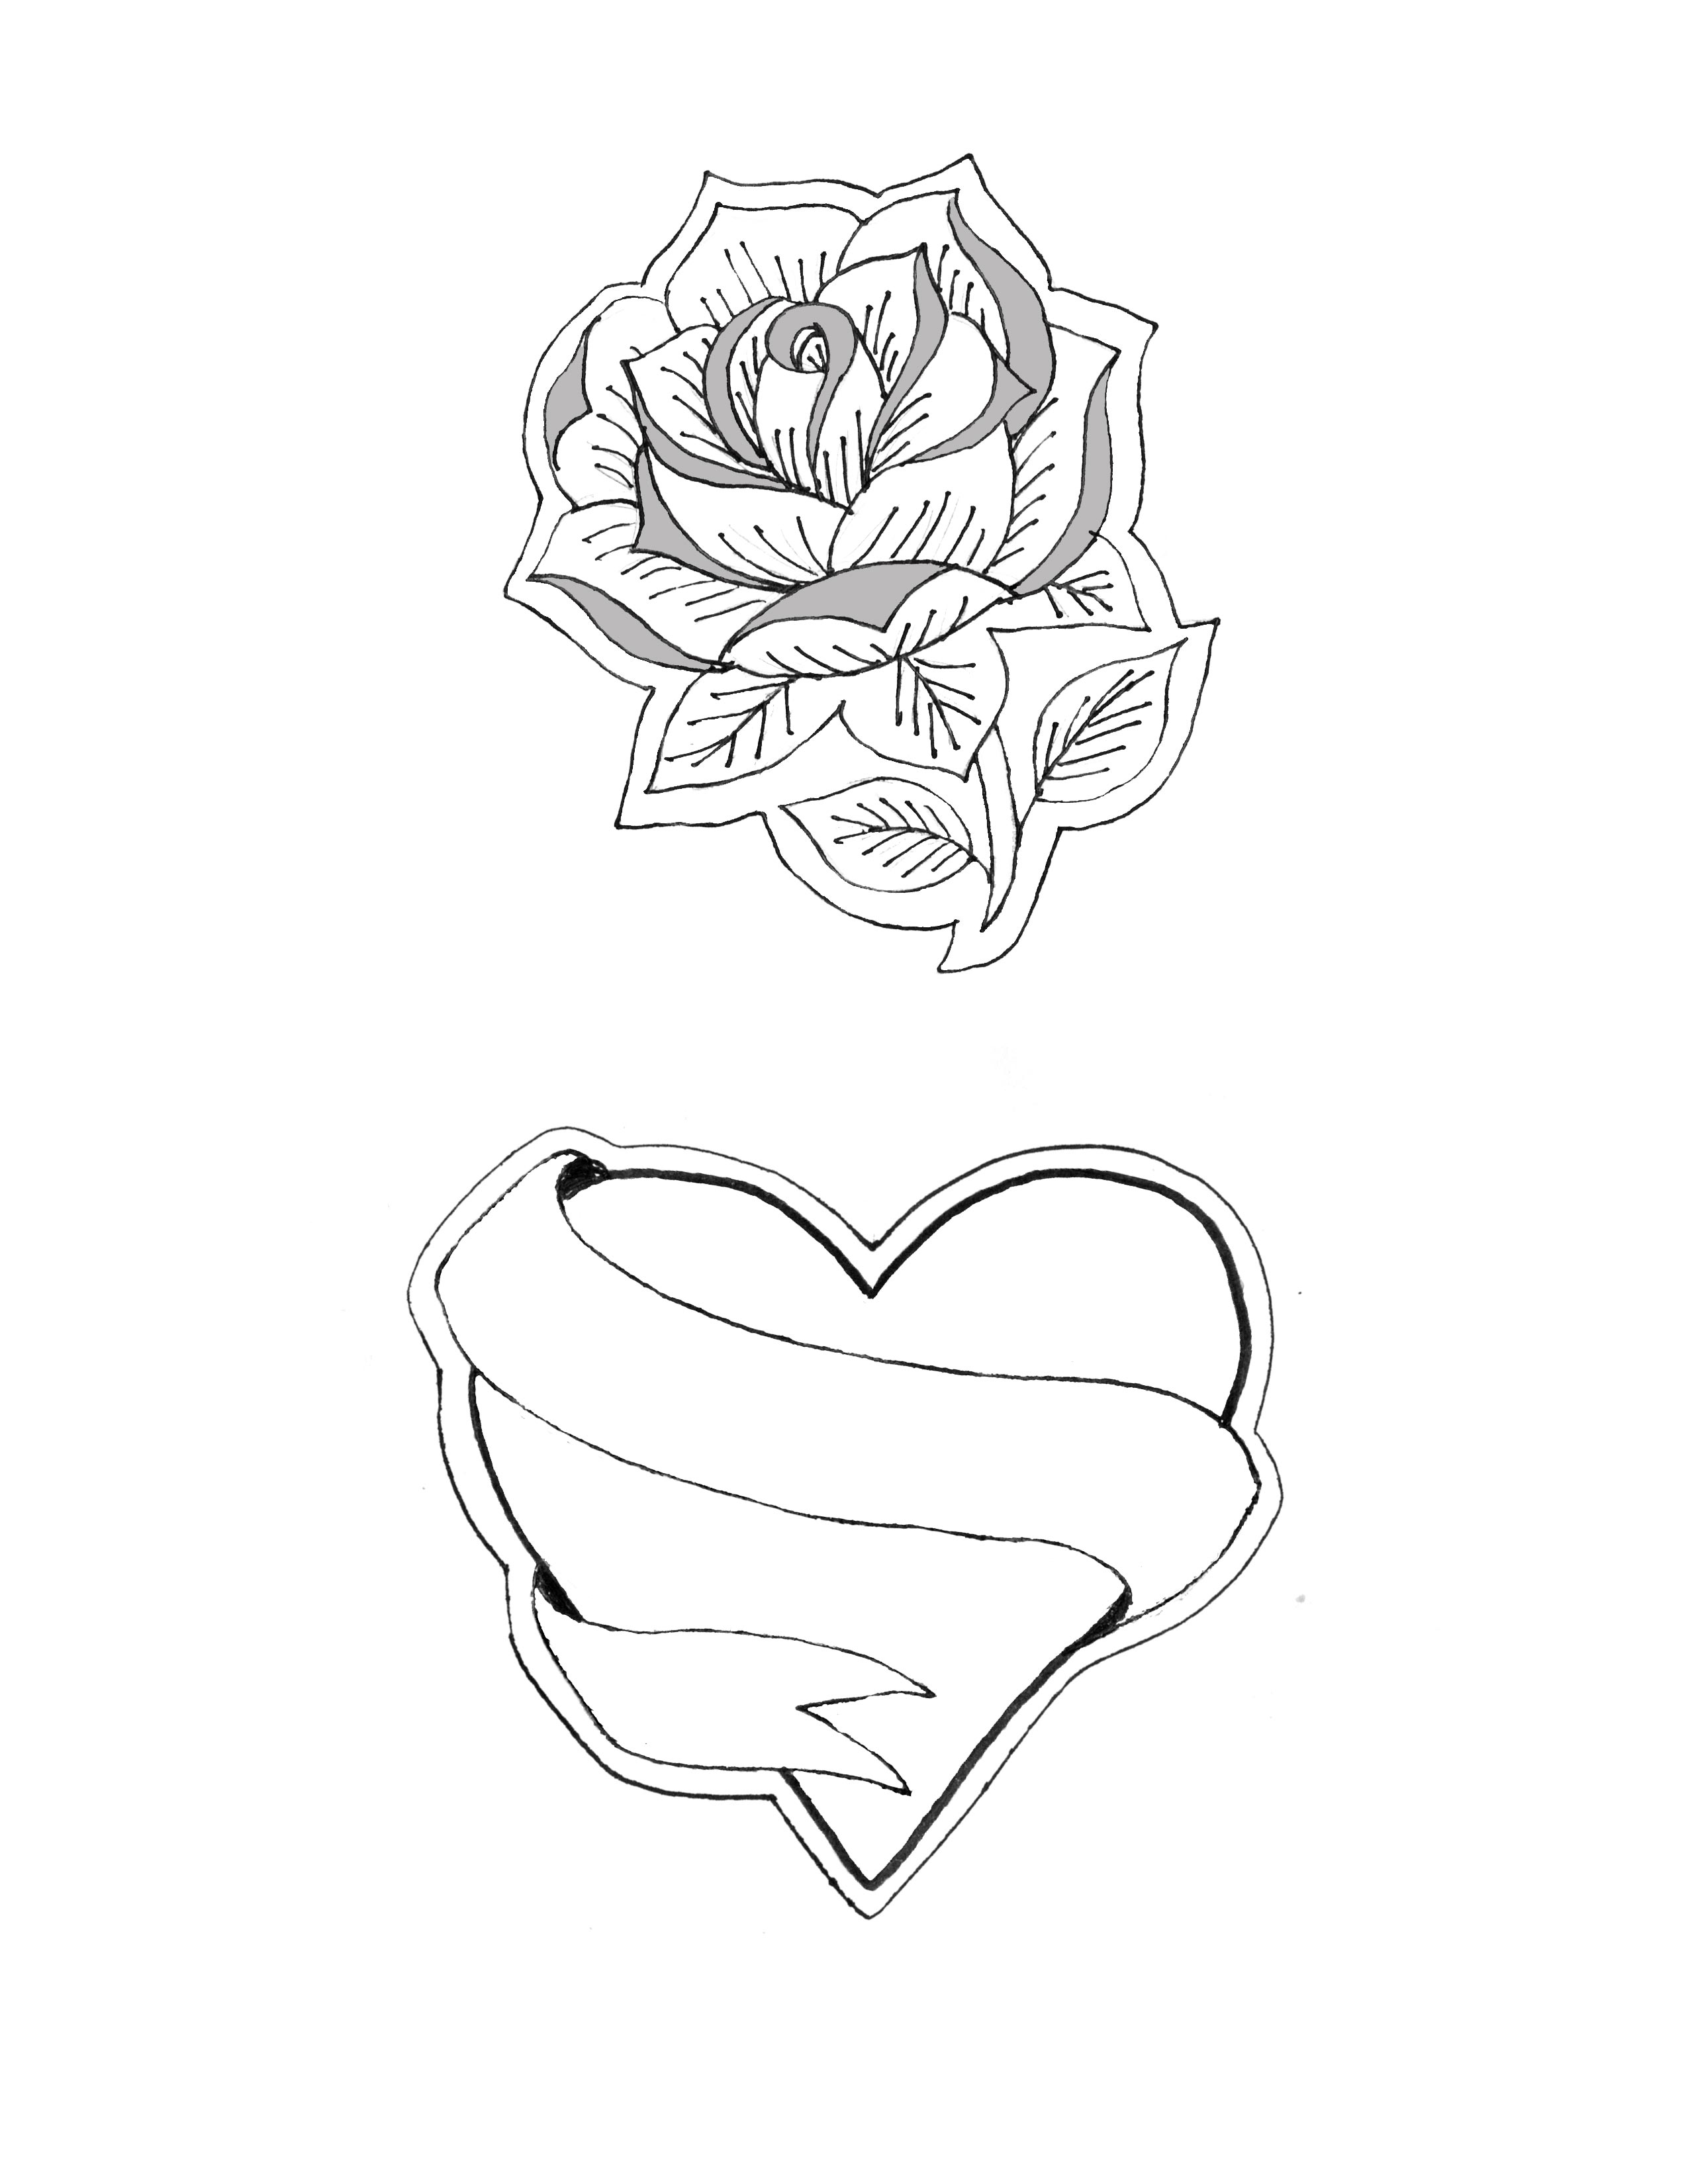
- Rose and Heart Templates
- Paring knife
- 15-second count royal icing in red, light beige, green and pink. (Test the consistency by taking a spoonful of icing out of the bowl and dropping it back in. It should take about 15 seconds for the icing to be completely smooth.)
- Soft peak royal icing in black
- 12” decorating bags
- Decorating tip numbers 1, 2 and 3
- Couplers
- Scriber needle or toothpick
- Black edible ink marker
Cookie Making/Decorating Instructions
Cut the cookies from a sheet of brown sugar cookie dough using the templates and a paring knife. Flip the rose template over to make one facing the opposite direction. Bake and cool the cookies according to the recipe instructions.
Ice the heart with red 15-second count royal icing and a decorating tip number 3. Use a scriber needle or a toothpick to help shape the icing. Allow the icing to dry 6 to 8 hours.
Use a scriber needle or a toothpick to scratch the outline of a ribbon into the dry icing as a guide. Fill in the ribbon with light beige 15-second count royal icing and a decorating tip number 1. Use the scriber needle or toothpick to help shape the icing. Allow the icing to dry about 1 hour.
Outline the cookie and the ribbon with black soft peak royal icing and a decorating tip number 1. Use the scriber needle or toothpick to scratch “MOM” into the icing as a guide. Pipe over the guide with the black icing. Add a scroll on each side. Allow the icing to dry about 30 minutes.
Use a black edible ink marker to add shading.
Pipe the stem and leaves of the rose with green 15-second count royal icing and a decorating tip number 1. Use the scriber needle or toothpick to help shape the icing. Allow the icing to dry about 30 minutes.
Ice the rose petals with red 15-second count royal icing and a decorating tip number 2. Use the scriber needle or toothpick to help shape the icing. Allow the icing to dry 6 to 8 hours.
Use the scriber needle or toothpick to scratch the rose petals into the dry icing as a guide.
Outline the petals, leaves and stem with black soft peak royal icing and a decorating tip number 1. Allow the icing to dry about 30 minutes.
Using the template as a guide, fill in the shaded areas of the petals with pink 15-second count royal icing and a decorating tip number 1. Use the scriber needle or toothpick to help evenly distribute the icing. Allow the icing to dry about 30 minutes.
Use a black edible ink marker to add shading to the petals and veins on the leaves.
Mother's Day Tattoo Cookie template


Deliciousness Delivered to You
Join our E-newsletter community and you’ll be among the first to receive the latest special offers, recipes, tips and more. Join us!